Friday, 31 January 2014

choo choo....

Another quick post today with a little boy's card. Massimo had another birthday party and I made this for his friend.


Train and boy are Kanban stamps whereas sentiment is a Clarity stamp. I stamped boy and masked him off to stamp train behind him. Stamped in black archival and clear embossed. Then coloured with promarkers and added some black wink of stella to dark areas for a subtle glint.


I then added some clouds in background and he birds again from Clarity stamp.
Finally i added some buttons hat matched the colour scheme of the card and added some glossy accents to train's window.
And that is all for now, Theresa xx


Wednesday, 29 January 2014

little mermaid..

Today's offering is a joint effort between me and Massimo. Or that i finished where he left off once he got bored.
We started by masking off area on card where the mermaid was going and then he pulled  print off gelli plate. It was done in 3 layers.

Then the mermaid (stampendous) was stamped in black archival and clear embossed. She was coloured in with promarkers. He enjoyed blending the tail, seahorse and face but when he came to the hair he got fed up after 3 colours and I had to continue.


I then stamped 6 today using the number set from Clarity stamp in black archival and clear embossed them too. I added some dots with a black micron pen to make the ovals look somewhat like bubbles as inspired by Amanda Branston.


Lastly I made some shrink plastic shells that i coloured with promarkers. And this was the card that was made for his little classmate whose birthday was last week.
I hope you like it and as you know i do love to read all your comments, Theresa xx


Thursday, 23 January 2014

new beginnings and purple/violet


Over at the Clarity stamp challenge blog the new challenge is all about new beginnings. I was commisioned to make a card for a 60th birthday and I thought it would be appropriate to enter in the challenge seeing that this is the entry to a new decade......the fab 60s!


Hence I set about creating it. I stamped the Sketch lady (I do really love her)in black archival and heat set it and then masked her off. Next I used the New York Skyline mask and using distress inks (antique linen, pumice stone and black soot) and a make up sponge I inked the skyline through. i masked skyline off and added a moon mask and brayered in sky with distress inks (tattered rose, tumbled glass, faded jeans and dusty concord). While i still had some ink on brayer I added a little bit of shade on bottom edge of card.


Then i coloured in the lady using promarkers and added a little bit of shade around her ankles to ground her. I finished topper off by adding some stars in sky and some lit windows in skyscrapers.
Then i stamped sentiment on base card in black archival and embossed in clear powder. I stamped 60th on a piece of card and die cut it. 


I added a piece of ribbon from my stash and looped it through a Sweet lilac buckle and tucked the small die under it as above. I finished card off with a flourish die from memory box.
The corners are spellbinders dies from a Sue Wilson collection.
Hopefully i have explained all of it. 
As i said I would like to enter it in the Claritystamp challenge which is a new beginning
and to Sunday Stamper which is purple/ violet

I hope you like my offering and comments are most welcome, Theresa xx


Sunday, 19 January 2014

happy birthday and faux decoupage

I got the inspiration for this card from Sue Wilson's blog. However the colour scheme started from a piece of grosgrain ribbon that I bought some time ago and never used. So brown and pink it was.


I started by stamping the sentiment from Clarity stamp in coffee archival and clear emboss twice. I die cut the small die first, laid it on the other one and when i had aligned it properly cut second larger die out. I attached the 2 dies with removable tape and stamped top and bottom with my favourite small leafy swirls in coffee archival. I cut another die in brown card and stamped leafy swirl on the other edges in versamark and brushed over in pink perfect pearls..
Next it was time to create background. I embossed a piece of brown card and went over it with gold gilding wax so it picked up embossing.
I stuck 2 thin pieces of pink card either side and hid join by brown ruched ribbon.


I attached the bow in corner and added a pearl embellishment coloured with gold alcohol ink as I did with hat pins. 3 pink gems finish the card. The base card is kraft card.
As always i hope you like what I have made. I do enjoy reading all your comments, hugs Theresa xx

Thursday, 16 January 2014

sweet lilac flowers and love


Well it's that time again when a new challenge is launched on the sweet lilac blog. This time it is love and with Valentines day around the corner I feel it is highly poignant.


I started with some centura pearl card and created background on the matte side. I inked with mustard seed, rusty hinge and gathered twigs distress inks. Spritzed with water and after a few seconds dried it off with paper towels. Then i used some perfect pearls and cosmic shimmer misters. Instead of spritzing i put some on craft mat and applied it with a small piece of kitchen sponge. One was a bluish tinge hence how the green came about.
Next came the word stamping and I used the sentiments from the birdcage set from Clarity stamp. I then stamped the small thistle bunch from the Rose 'n' thistle set from Chocolate baroque in versamark all around the edge of card and brushed with mica powders matching the spritzers. To finish off background i went around all the edges in alnut stain and this helped the colours to pop.Then i stamped heart from same set ( choc bar) on brown card and embossed in gold and fussy cut it.

It was then time to embellish. I used lace from Sweet lilac flowers which i tinted with walnut stain so it matched with background. next i used some white paper roses again from Sweet lilac. I inked some with walnut stain and dipped all of them in the gold spritzer so they blend more with backround. A little gold bow finishes the bunch.


I matted it on black, an orange and green and then again black. It was then mounted onto Kraft card. finished dimensions are 8x8.
It would be very nice to see you over at sweet lilac challenge blog and you have the possibility of winning some gorgeous flowers that are so versatile.
So see you there, Theresa xx


Monday, 13 January 2014

monochrome and chalk technique

The idea for this card came to me when i was reading Sue Wilson's blog and she described what she calls the chalk board technique.
I started by stamping the background stamp called journey from Justrite in snow cap adirondak on black card. The white isn't sharp and bright and hence the term chalk board as it looks like chalk on blackboard. I cut it to size and matted it on white and then black again which i edged all around with a white pen mimicking stitching. I matted again on white which I had pierced all around edges. I mounted it on a white A5 base card using foam tape.


Next I stamped the HMS Victory in versamark on black card and embossed in white. I diecut it with a circle die from spellbinders and drew around same die on white card and fussy cut creating a mat for topper. I stuck it down with thicker foam tape in corner of background as shown.


 Next it was time for the sentiment and i thought the banners from Clarity stamp were ideal. It is stamped in black archival and clear embossed. I wrote the sentiment in black micron pen and clear embossed the greeting. Then i added some shading, to enhance the folds, in pencil. I tried to shape it following the folds. 


Finally i diecut the anchor (again a spellbinders die) in black card and went over it with autumn blaze and patina gilding waxes to age it. I strung it through some thick cord to mimic rope and attached it as shown.


Once i'd finished the card I realized it was monochrome so it was perfect for the Fussy and Fancy challenge which currently is monochromatic. I hope you like what I came up with and comments are appreciated, Theresa xx
I would also like to enter it into the Totally Gorgeous challenge which is manly.


Thursday, 9 January 2014

birthday invite

Well Massimo will be 6 at the end of the month so I needed to come up with some invites for his soft play party. They had to be simple enough to be able to make a batch in very little time.


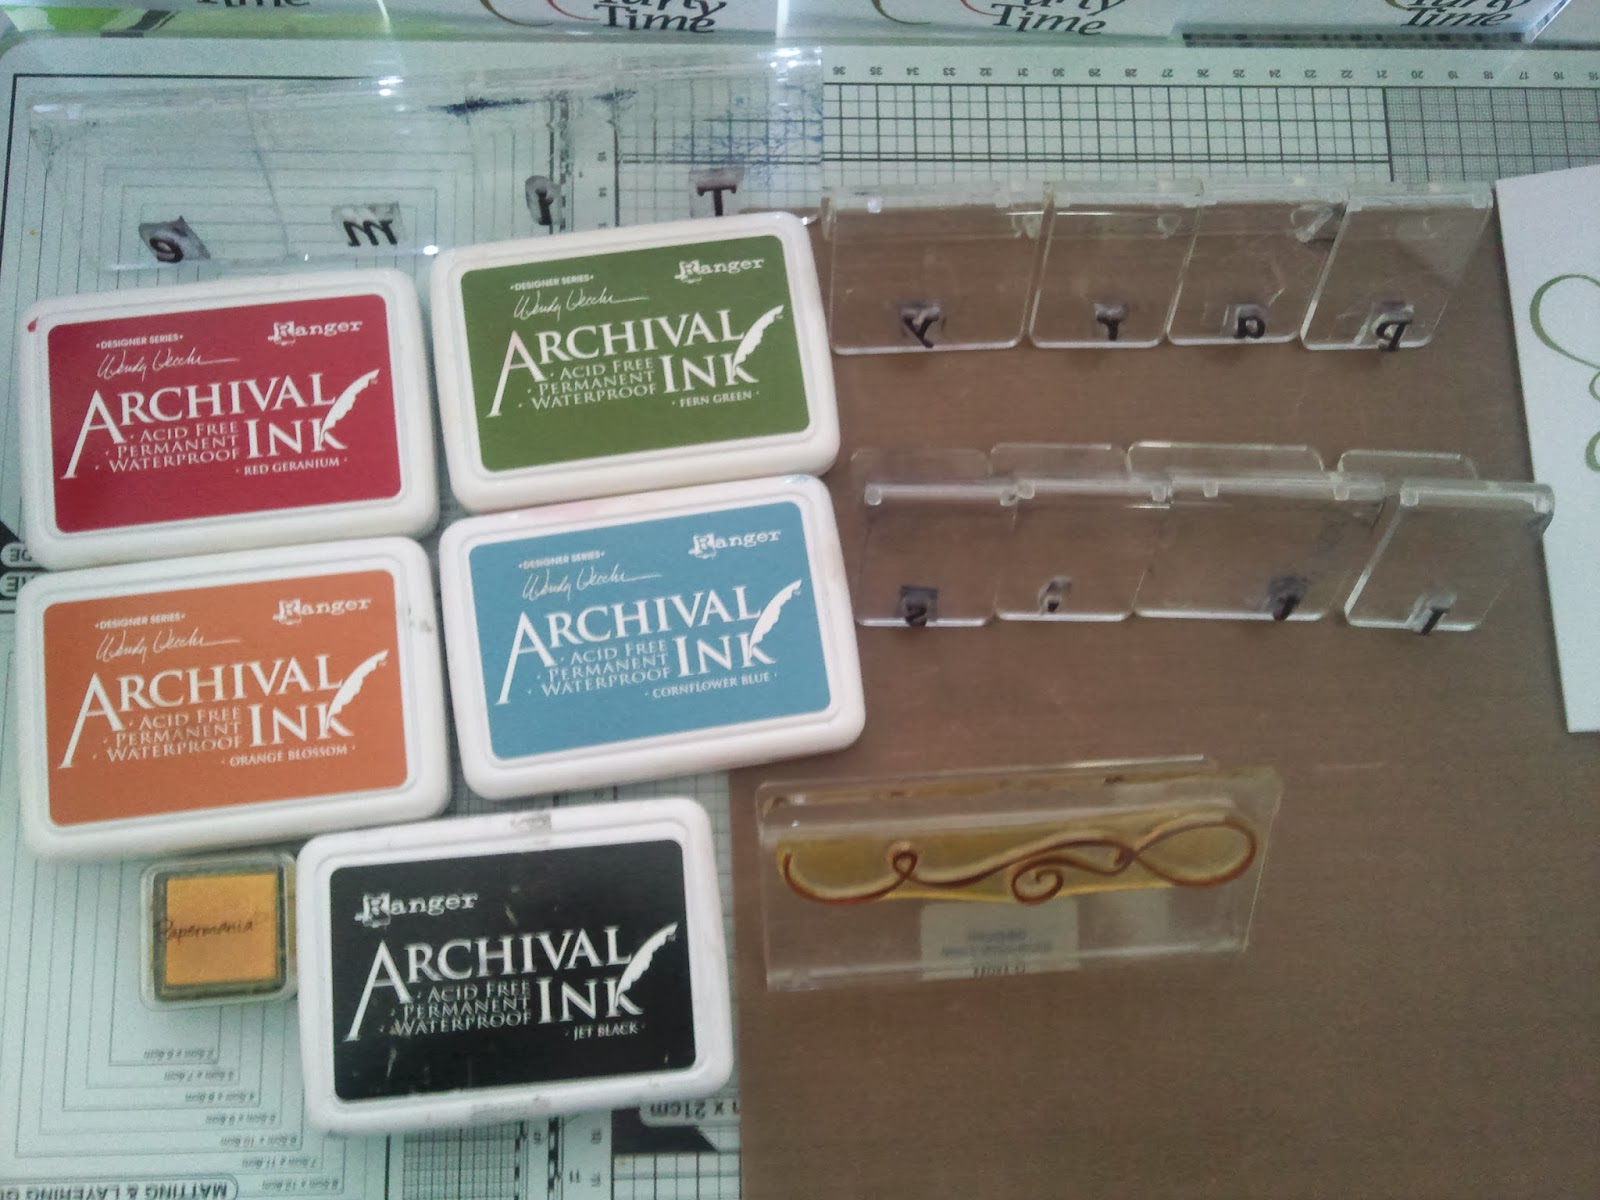
I got the idea off the invoice that the Leisure centre gave us. It reminded me of the balloon stamp from Clarity stamp. I then got the letterbox kit out, which is also from Clarity and then decided on inks to use. I really love the new archival inks by Wendy Vecchi so I decided to use 4 of them and a yellow pigment ink to complete set.


These are all the ingredients used and in the end I produced these:


I like them and i felt they were clean and simple enough for a 6 yr old. What do you think? Theresa xx


Saturday, 4 January 2014

new ndc stamp

 As I returned from holidays today i hadn't yet seen the new ndc stamp. I had seen a pic of it so when i found envelope i quickly opened it and it looked as good if not better in real life. As I hadn't crafted in over 2 weeks i was really itching to have a go. Whilst we were away we had received some Christmas cards and as it was too late to reciprocate i decided to make some new year cards as i think we are still ok with that.


So I found The stamps from lesson 14 Clarity stamps and some distress inks and archival inks.
I started by stamping the treescape in cobalt blue archival ink and watering can for grey. Then I placed the dear which i stamped over a torn piece of copy paper to create illusion of legs in snow. I used the small moon  mask and then proceeded to ink sky using the clarity brushes and distress inks. I used faded jeans and chipped sapphire and black soot for blue and old paper and pumice stone for grey. Snow was created with make up sponge and weathered wood for blue and pumice stone for grey. I darkened the outer edges with the darkest ink and stencil brushes and stamped sentiment again from clarity stamps. I decided that the blue ones needed some sparkle so i added flake and glitter glue and frosty glitter to moon.


And there i had 4 cards ready to use. So as usual i hope you like them, all for now, Theresa xx