Saturday, 7 December 2013

purple birthday


This was the card I made for my friend's 40th Birthday. This time i used: Spellbinders gold embossing 1
blossom 3
die-lites sprig
letterbox numbers from Claritystamp
happy birthday from Claritystamp


This is the finished card. i started with a piece of white card and using the triangle i cut it out and embossed it 4 times thus creating a square. I cut a piece of purple card slightly smaller than white and sprayed it with iridescent multicolour glitter spray from Crafter's Companion, and stuck it to the white square. I matted this on a larger piece of lilac card and then white again. 
Then I stamped sentiment (with help of some masking) in black archival and clear embossed it. I cut it out with the squarish die from same set. I drew around same die on lilac card and cut it out with scissors as a mat. Stuck 2 pearls each side of 40. The little ones are all liquid pearls. Here is a close up of topper and flower.


Next i die cut flower in purple and stuck a pearl in centre. Then i cut 3 sprigs from purple card and sprayed them with glitter spray. I then tied purple organza ribbon around the bakground piece and tied a knot at side. This is where i added a twine bow and sprigs and flower. I then added sentiment with foam tape for some dimension.
The finished card is 8x8. Whatever you do enjoy yourselves, Theresa xx

Sunday, 1 December 2013

lesson 23 homework


This was another card shown yesterday on classroom show. I used house stencil, sun mask, and stamps from rise and shine set and birdcage.
I started by cutting a piece of theuva card to 15x15 cm. I laid innie of stencil down choosing are that I  was happy with ( I sprayed it with stick and spray as my gate bit is wonky and otherwise moves).


I used a dream weaver stencil brush to put down black. Unlike Barbara I used black archival ink as I didn't want it to bleed when i used the distress inks later. I then stamped branch from bird cage set to frame artwork.

Then I positioned sun mask to side and using clarity brushes I inked with squeezed lemonade, mustard seed and spiced marmalade distress inks. I lifted mask and swirled inside the sun with what was left on brush. I turned mask slightly thus covering the rays so I could ink sky. I used tumbled glass, broken china, spun sugar, tattered rose and spiced marmalade.

Next came hills which were simply done using a piece of copy paper and peeled paint ink.

I finished it off by stamping sentiment in sun, cat on fence and  3 birds from bird cage. Matted and layered on complementing colours of card.

Finished size 7x7.

So i hope you haven't gone to sleep and kept with me till end. Have a good day, Theresa xx


Saturday, 30 November 2013

lesson 22 flowers


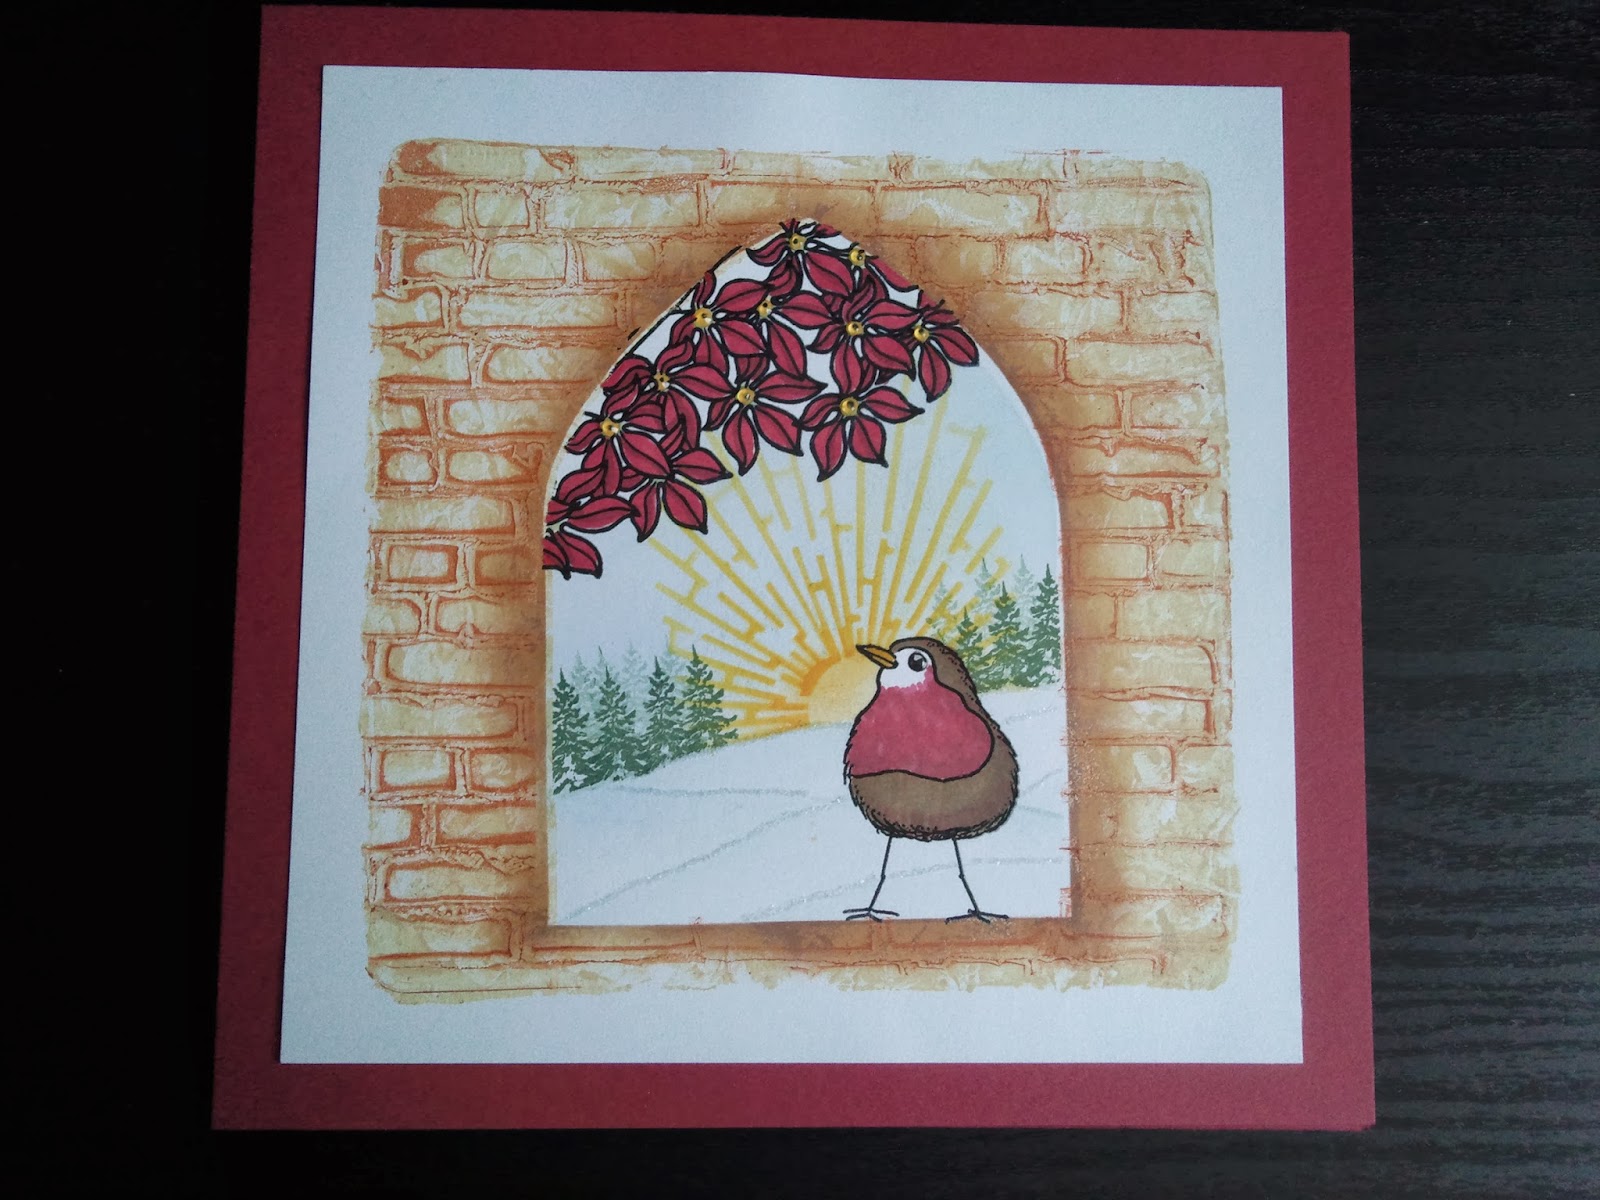
This was one of my cards that I sent in for homework. It was one of the very first ones i made with the stamps.
i started with the gelli backgound. I drew around the opening of the arch stencil on a card and put it under gelli plate.


Then i used buff titanium paint and covered gelli. I squashed a piece of copy paper and dabbed off some paint especially over the arch. Then i put a an arch mask over plate and pulled a print.


 I added brown paint and used the brick wall stencil on top. I removed some paint with copy paper, removed stencil and again put mask over arch and put the first print on top to pull second print.


Then I stamped the large robin in black archival and embossed with clear powder. I also stamped flowers in black archival and clear embossed as well. Hills were created with torn copy paper and inked with clarity brushes. The sun was cutout in the arch stencil and again inked with the brushes. Forest created with small fir tree.
Flowers and robin coloured in various promarkers.
Finally finished off with some frosted glitter to give illusion of snow, and glossy accents in flower centres and robin's eye.

Sorry for the long post. Hope you stayed with me till the end and if you liked it please leave a comment. Hugs Theresa xx


Massimo's homework


Well as those of you who met him now know, my little fellar is very headstrong and will only do what he wants. i showed him stamps and stencil and he decided he wasn't using the tree. He wanted to use woodpecker, flowers and sunshine. So the woodpecker was stamped in black archival and clear embossed and so were the flowers. I then made masks for them as he is not as good with scissors.
He decided where he was putting sun and using ink dusters and distress inks 
(squeezed lemonade, mustard seed and spiced marmalade) he set to work on sun. He loved the finished result and next wanted some hills. He didn't want to use stencil but wanted torn copy paper and that's what he did with peeled paint and an ink duster.
He thencoloured woodpecker with berry red promarker anf flowers with yellow and gold as that was his choice. I was kind of told to stick it down as he finds this bit boring and that was the finished result.

He loves to hear all the comments, so please feel free. Thanks Theresa xx


Friday, 29 November 2013

filligraphy stamp


Well today I'm hoping to keep it short. This card was inspired by Jane Telford. I really like these new filligraphy stamps and to me they shout black. 
So I started by stamping the corners of a square piece of card with versamark and embossing in superfine rich gold wow powder. 
For centre piece I stamped and embossed image 3 times using mica boss and then I brushed with mica powders, burnt red, burnt orange and 2 greens: kiwi and can't remember. I mounted layers with pinflair glue for dimension and added glossy accents on central leaf.
I finished card off by matting it on black coated clarity card and gold mirri.

Finished card is 8x8. All for now Theresa xx

Thursday, 28 November 2013

christmas baubles


Well yesterday my 11 yr old remembered that he was supposed to hand in some baubles for today. They needed them to sell them at Christmas fair to raise money for Clic Sargeant charity. And what I forgot to say was that the best bauble would win a lot of house points. 
So out came the MDF baubles I had bought at Ally Pally. They had to be green as that is his house colour. So I thought that the easiest way to make them green was to paint with acrylic paints. Some gold acrylic was added for highlights.
Then he wanted them shiny. So I dug out the clear UTEE and he had a blast glazing them. Added a layer of stardust embossing powder for more shimmer.

Green fantage fragments were added to tree while powder was still molten and also the green gems so they stuck down firmly.


It was finished off with gold ric rac for tinsel.
The bauble had thick frantage green glitter added to molten UTEE and glazed over again. It was finished off by a snowflake die cut with 3 layers. The first was glittered in gold, the middle layer was gilded with crafty notions variegated green and the top flake was copper glitter. It was finished off by a green gem.


The 3 glitter stripes are achieved by 'orange' double sided tape.
Lastly came the star. After the first 2 layers of clear UTEE, we added frantage green enamel which is mixed with gold. Some more UTEE was added and a little sprinkle of stardust to leave it with a more vintagey feel. It was then embellished with a poinsettia diecut that was glittered and finished off with a green pearl.


We really had fun making these. I hope you enjoy them and get some inspiration.
We would love to know what you think of our combined effort, Theresa xx

Tuesday, 26 November 2013

60th birthday


This was a commissioned card for a 60th birthday and i was asked to use shoes and bags. Well it looks so simple but it took me ages to decide the layout and what i was using.
The upper left hand corner is all kanban die cuts from some stash i had. The lower shoes and bags are kanban stmps used on silver mirri.
The others are spellbinder dies. Birthday is a peel off sticker.
When i was happy with layout i stock it all down after I had added some black glittered ribbon.I finished it all off with some gems.
Finished card 8x8. 
Have a good one Theresa xx