Wednesday, 22 October 2014

happy diwali...


Hello again. I have been busy on the blog this week. These cards were commissioned by the lovely lady at my post office. She asked me to make 4 Diwali cards for her so obviously there are 2 more to come....


For the background i used an A4 piece of card. I stamped the alliums from Claritystamp and circle cluster from Designs by Ryn in versamark and clear embossed. i felt that these stamps could easily double up for fireworks, hence the link with Diwali that is the festival of light.
Then I inked it all over with warm distress inks. I then sprayed with a vintage green cosmic sheer spray as green is the colour in Hinduism. I finished background off with biscotti perfect pearls shimmer mist.


I cut a 15x15 cm piece and covered my base card. Then I stamped sentiment from the Claritystamp word chains and embossed in gold. Obviously Diwali involved a lot of masking using 4 different stamps. This card was then finished off with some gems fo extra sparkle.


The second card was made with a left over piece of same background.


I cut a strip of red card and covered it with cosmic shimmer vintage green pva glue to mimic pearls. To disguise the join a little I put double sided tape over it and used gilding flakes over it.


Then i cut a strip of white vellum and using the Letterbox  set from Claritystamp I stamped sentiment in versamark and embossed in brown tinsel. Then i went aound edges with versamark and embossed in blue tinsel. I stuck it across card along outer edges. 


Lastly I went around all edges of card with versamark and embossed with gold.

I do hope you like my offerings. The lady sure did!

I would like to enter these cards in the following challenges:

Sunday stamper - faux techniques (faux fireworks)
Fan-Tastic Tuesday challenge - anything goes with a twist: use flowers (alliums)
TTCRD - anything goes



Monday, 20 October 2014

sketch challenge

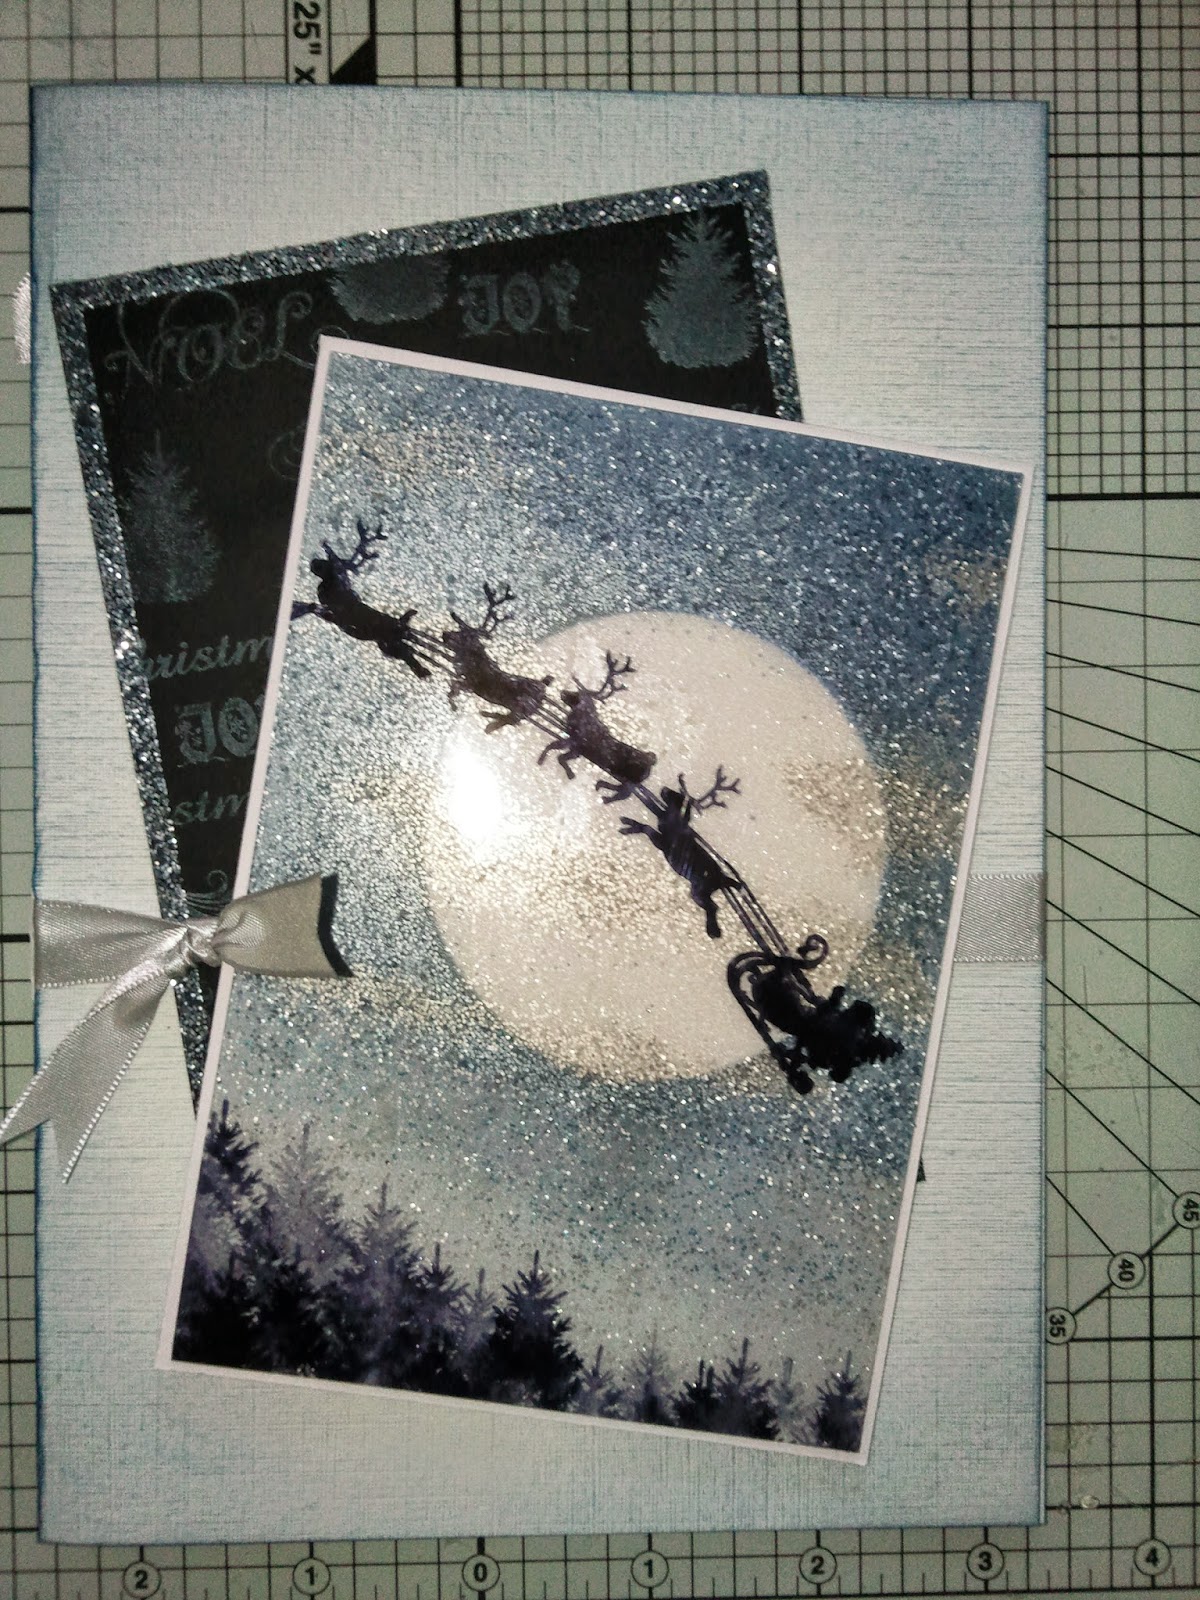
Hello there. This topper is one I've been wanting to create for ages. 
This time I have really cut it fine for this challenge. So I'd better stop waffling and get on with it.


The challenge was to create a card following the sketch below.


So I prepared main topper first. I stamped images, that are all from IndigoBlu, on acetate. I heat set them as I used heat resistant acetate and stuck it on a double sided sheet of adhesive. I cut a circle from the backing and stuck it back down again. I used distress glitters to colour the moon, rock candy and pumice stone for clouds. I lifted rest of backing off and filled in the rest of the sky using blues.


Next I created the other panel of card. I stamped it all over with small Christmas imges using Adirondak snowcap white. Then I put thin double sided tape all around and glittered it with a mixture of all the glitters that I had used on topper.


The base card is A5 linen card that i brushed with distressed inks. I stuck black card down and then the silver ribbon. Finally I added the topper which I lifted on foam pads.

As usual I do hope you like my make, Theresa xx


I would like to enter this in the following challenges:

IndigoBlu - a sketch

Wednesday, 15 October 2014

get spooky

Hello my crafty friends. Today's offering is constructed with Visible Image stamps and the brick stencil from Claritystamp.


I started by stamping Edward first in black archival and masked him off. Then I stamped the background. First I stamped the castle in watering can archival ink. Then I laid down the outer part of stencil just leaving the opening visible. I then stamped trees in black archival. For the front I used the stem from flower incognito which i again stamped in black archival. Finally I added the bats.


I added moon mask and castle mask and coloured in sky with distress inks and brushes. I coloured in castle and Edward with spectrum noir pencils. i masked Edward again and added some shadow around him and grounded him.


I masked the opening and left Edward masked and swapped the stencil fro brick stencil. Using brushes and distress inks I coloured it in. i sharpened edges with a make-up sponge. Then I added texture with a texture stamp from Jake skates set.
Then I stamped and embossed 3 large bats which I fussy cut and added to pic after molding wings to give some dimension.
Finally I added some highlights with a white pen and glosy accents to his eyes and shoes.

As usual I hope you like my make, Theresa xx

I would like to enter this card in the following challenges:

Visible Image - get spooky
Simon says stamp Monday challenge - O is for October and so Halloween
TTCRD - anything goes 


Wednesday, 8 October 2014

graphic 45, pink and micro beads

Hello there. Anyone who knows me knows that pink isn't one of my favourite colours. However when it comes to G45 they make pink palatable even for me.


All the papers used here are from the Botanical tea collection 12x12 and 6x6. I also used a couple of stamps from the collection and some of the embellishments.


I inked all the papers with vintage photo distress ink to remove the white cut edges. The die cuts are from the Sue Wilson Salzburg collection and leaves. I also added some lace that goes well with these papers.


Something I love to use is micro beads. I wanted something to add texture without being sparkly. They are perfect as they give a little twinkle. I used them on the leave flourishes and on the edge of the die cuts.


As you can see the 2 postcards are not stuck down. I stamped a sentiment on each in vintage photo and added glossy accents to highlight some areas and add interest.


The butterflies are fussy cut from the 12x12 papers and attached only at the centre and wings molded to add dimension. I added glossy accents to body of butterflies. 


I finished card off by adding some pearls.

As usual I hope you like my make, Theresa xx

I would like to enter the card in the following challenges:

Simon says stamp Monday challenge - falling in love with..... micro beads and G45
Fan-Tastic Tuesday  - anything goes with a twist - wings: butterflies and birds
TTCRD - anything goes


Sunday, 5 October 2014

Celebrate with Designs by Ryn

Hello again. Finally, I managed to produce an effect I've been after for a long time. That's having a multi-coloured ink pad as my Ranger big and juicy ink pads do not have separate colours anymore but a blended ink! 


I used the cut 'n' dry felt pad and distress re-inkers to make my own ink pad. Colours I used include shabby shutters, mustard seed, squeezed lemonade, tea dye, rusty hinge, fired brick and aged mahogany.


I started by using the flowing branches stencil and inked through it with distress inks and a make up sponge. I used tea dye, brushed corduroy and vintage photo. Using the make shift ink pad and the abstract leaves I stamped a number of them along the branches. I stamped another lot on another piece of card and fussy cut them. Then I layered some of them as shown adding some dimension.


I stamped the sentiment from the word chains by Claritystamp in red geranium archival ink and clear embossed. I did feel that this stamp finished it off nicely. I used a promarker to edge the art work and mounted it on an A5 white base card.


On the inside I stamped another sentiment from Claritystamp in red geranium archival and added 3 leaves that I had cut earlier.

As always I do hope you like my offering, Theresa xx

I'd like to enter my card in the following challenges:

TTCRD - anything goes
Pink gem challenge - clean and simple
Sunday stamper - autumn leaves


Saturday, 27 September 2014

Brushos and Clarity stamps

Hello again. Today I have a card that showcases Clarity stamps. As you can see below it started it's life as a brusho print.


There are days when I decide to play and see what happens. This was one of those days. I was playing with brushos on watercolour paper and wondered if I could produce something looking like a landscape. I know I used grey, moss green and ultramarine. I can't remember the other blue (sorry). It resulted in this print. I also have a mirror image of this which is more probably suitable for seascape, but that's for another day.


Once it was dry i could stamp on it. I trimmed it back and stamped the log cabin in coffee archival ink first. I masked it and using a torn piece of copy paper and the tree, I stamped it in olive and fern green using 1st and 2nd generation ink. I heat set these and then stamped the stag in black archival and clear embossed. The star was embossed in crystal on black archival.


Then i added the shading in the snow using weathered wood distress ink, said torn paper and a make up sponge. Then i coloured in log cabin with spectrum noir pencils and added a bit of halo around star.


It was time to add the glitter to the snow and the cabin roof. The last thing I did was to add some touches of white gel pen to cabin. Then I inked around edges with faded jeans and chipped sapphire distress ink. 


I mounted the topper on black and then used kraft card as my base card. I then stamped one of the banner greetings in black archival and clear embossed it. I inked it with distress inks and added depth with darker colours. I fussy cut it and shaped it with my fingers and laid it on card.


However the greeting is not stuck down. So tell me what do you prefer with or without greeting? Theresa xx

I'd like to enter this card in the following challenges

TTCRD - anything goes
Sister act card challenge - anything goes


Wednesday, 24 September 2014

stamps, stencils and paper roses...

Hello again. Today's offering is a canvas I made at a workshop recently. This was with the very talented Hels Sheridan.


I am not going into detail about this one as i don't think it would be fair to Hels. We started with an 8x8 canvas.


To add texture we used die cuts and grunge paste through stencils. The colouring was with acrylic paints.


Stamping was in archival ink. There is stamping on background, main sentiment in banner style and also on masking tape to mimic washi tape and add more texture.


Finally it was time to add embellishments. The paper flowers including roses and daisies where spritzed in black and cosmic shimmer. Some gilding wax was added to embellies and around the edge. some coloured micro beads and dew drops finish it off.

As usual I hope you like my creation, Theresa xx

I would like to enter this in the following challenges:

Simon says stamp Monday challenge - stamps and stencils
Sunday stamper - paper roses
TTCRD - anything goes