Tuesday, 15 July 2014

birds of a feather

Well time is really flying and if blogger is working properly this should be published on the 15th of July for the launch of a new Sweetlilac flowers challenge.
At this time I should be sunning myself.......
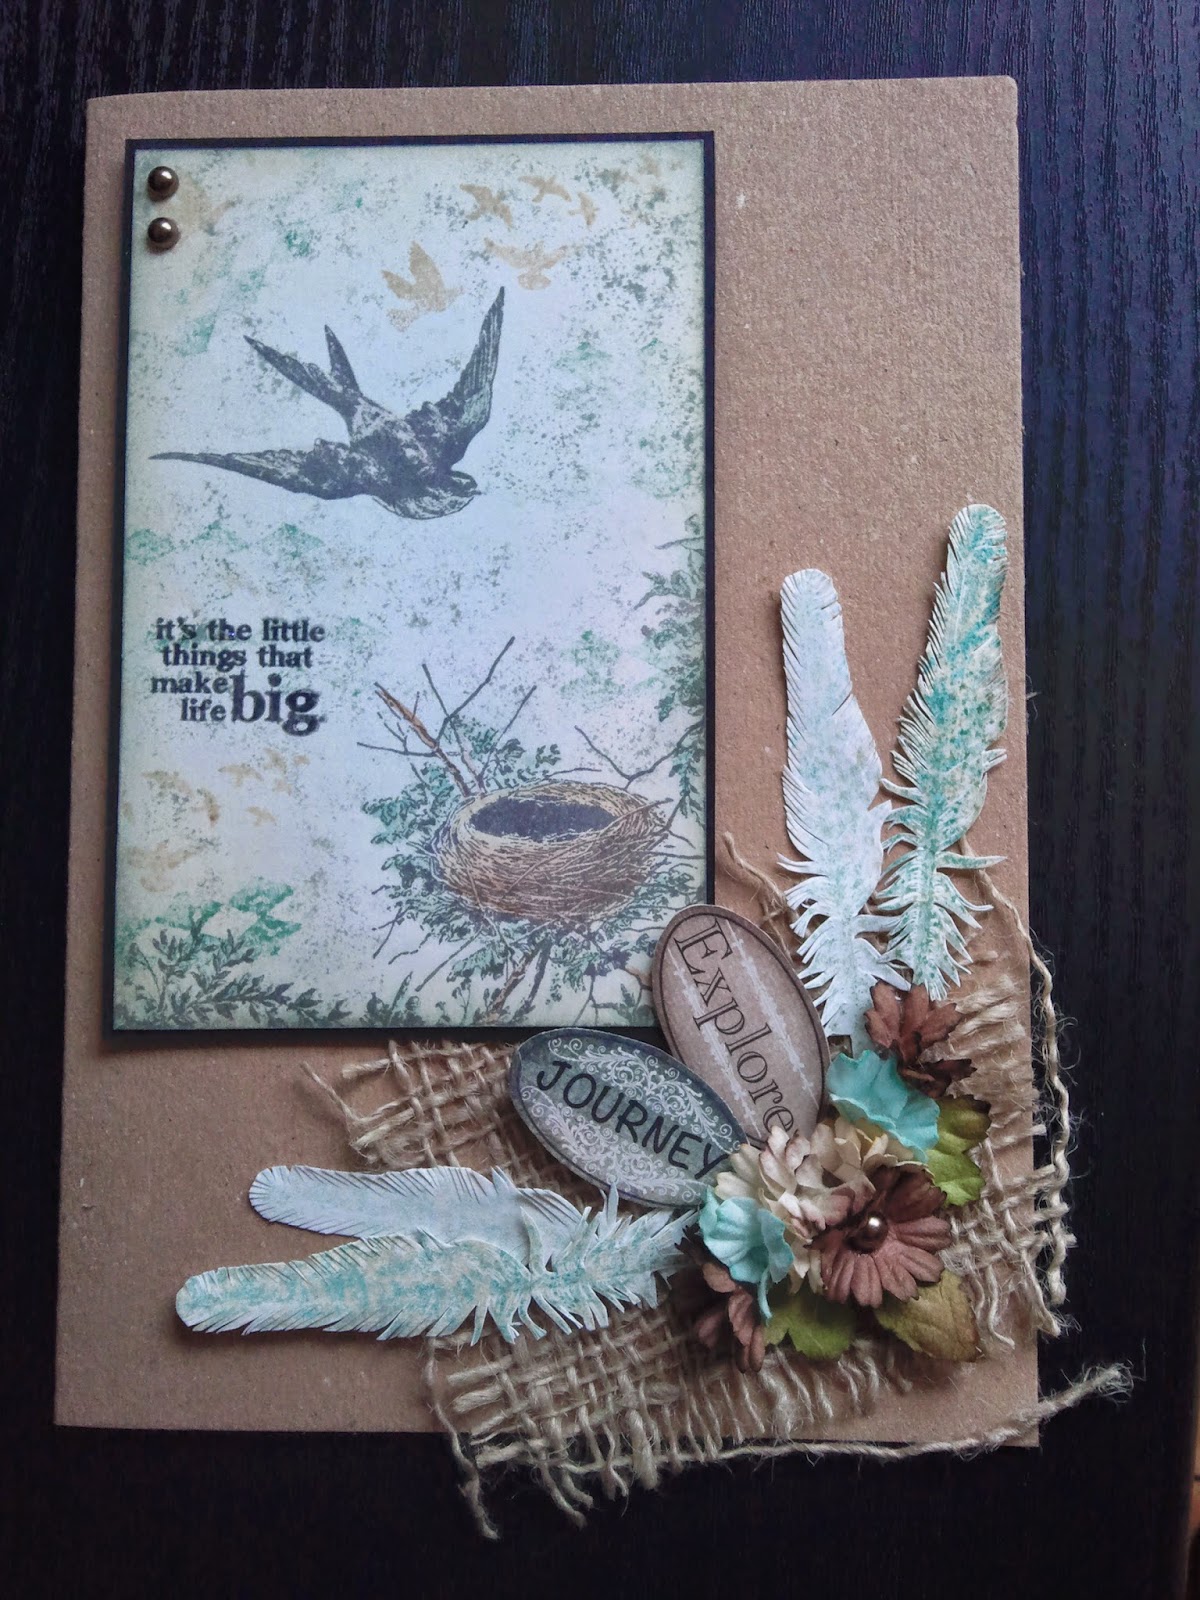

Back to the card....I started with a piece of white card. Using watering can archival ink i stamped the nest and the swallow from a Tim Holtz set. (They are a smaller size)Then i used old paper and tumbled glass distress inks and tinted the card using stencil brushes. Around edges I added some antique linen and then some iced spruce with a blending tool.


I then used antique linen, vintage photo, evergreen bough distress markers to colour images. Using same colours of distress inks I used Tim Holtz mini stamps around the background. Then I stamped sentiment from Tim Holtz in black archival and clear embossed.

 
You can see embossing in this pic.


For the embellishments I chose Sweetlilac blooms that had the same tones as my main image. I arranged them on a piece of burlap to add texture and added a pearl on main flower and some leaves underneath.


The 2 small tags are fussy cut from some heartfelt creations papers. I thought they really went well with the colour tones of card, but see what you think.


The feathers, again a Tim Holtz stamp, are stamped in first and second generation ink and fussy cut. Then i tucked them underneath the flower cluster. 
The whole card was then mounted on kraft card and I added 2 brown pearls at the top left hand side of topper.

So I hope you like my offering. Please join us over at sweetlilac challenge. Don't forget the winner will get a lovely hamper of Sweetlilac flowers, Theresa xx


Monday, 14 July 2014

Tag

Well at my son's school there are some teachers that are retiring and he asked me to make some cards for them. This is one of those cards.


I started with a manila tag and stamped the lady from pomp and pageantry from Indigoblu in second generation black archival ink. I think this woman is very strong and determined and you could see this from her face. I coloured her with distress markers mainly tattered rose, weathered wood and tumbled glass. 
Then I set about preparing the background. I masked image and stamped various images in different brown distress inks from Sarah's choice and the flourish again from pomp and pageantry. Then i inked the background with distress inks and added shadow around main image.


I added some Tim Holtz tissue tape below lady and across one upper edge and inked up those areas again.
As I didn't have matching ribbon I tinted some american seam binding in matching inks and tied a double bow. I added a Tim Holtz accroutement over the bow and some ideology flowers at the bottom corner.

And that is the finished tag.

The card was created with same stamps, but in more faded colours so as not to compete with the tag.


Hope you like my offering, Theresa xx

I would like to enter this tag card in the following challenges:

IndigoBlu challenge - tag....you're it (tag)
Simon says tamp monday challenge - about a face (finished card)
Simon says stamp wednesday challenge - let's be clear (glossy accents)


and this is the finished card with a Tim Holtz sentiment and glossy accents over the R

Friday, 11 July 2014

two fer day.....


Today I am featuring 2 cards. I did not make these unless you consider matting on black and sticking to base card as 'making a card'. The artwork was done by my lively 6 yr old Massimo.


These are the thank you cards he has made for his teachers. This first one is for his year teacher Mrs Chester. He said she likes the warmer colours so he wanted a warm sunny picture. 


So some masking first. Then using the ink dusters he created background. He loves making these kind of pictures as they are quick but striking. He used, festive berries, ripe persimmon, dried marigold, mustard seed and squeezed lemonade and shabby shutters. Then he decided it needed a bit of brown and I handed him fired brick which he thought was an awesome colour. He put a tiny bit on the upper edge. and I think he was so right!


The images are all from Claritystamp and were stamped in black archival ink. I do hold his hand a little bit here so as to keep stamp steady. The sentiments are also from Clarity stamp.
Notice the 3 little birds? Yes you guessed it. Mummy manages to smudge it when matting so had to salvage it :).


This card is for the TA Ms Malick. Here he used chipped sapphire, faded jeans, dusty concord, picked raspberries, tumbled glass for the sky. He then said it wasn't night enough and decided to add a bit of black soot. This transformed it. The hills are inked in bundled sage, peeled paint and forest moss.


It was his idea to have owl 'in the moon' - his words.


I am biased I know but I do think that these cards are stunning in their simplicity!

If you enjoy them too, do leave him a comment. He will be thrilled! I wish I could have captured his enthusiasm when he was making them......., Theresa xx

I would like to enter these in the following challenges:
Claritystamp challenge - anything goes
Fan-Tastic Tuesday  anything goes
Sunday Stamper - hello and goodbye

Thursday, 10 July 2014

Thank you .....

Today it will be a very quick post. Just pictures. If you would like details of how to make these cards please look at Barabara Gray's blog here.


I needed 4 thank you cards for my little boy as he finishes school tomorrow and the blog post from today gave me the inspiration.


Hope you like my offerings, Theresa xx


Wednesday, 9 July 2014

summer colours


Hello my friends. I'd actually made this topper about a month ago with the free Lavinia stamps that came with a craft magazine. I don't know why it took me so long to finish it off but this happens sometimes, at least to me.


Anyway less fuff .... So I started with the background. I masked off a moon and then worked with several gelatos, water and my fingers as applicators and blending tools. I love working with these crayons.


Then came the stamping. All the images are freebies bar the sentiment. I used black archival for all the stamps and alternated first and second generation ink for the repeat patterns. 


Then i added white opal liquid pearls and added glitter to it.


In each corner is a ruby red liquid pearl. I matted and layered and was ready to put on base card. however it looked quite bare. So i got out distress inks to match the gelatos and repeat stamped the stars kind of diagonally.


In the opposite corner i repeat stamped the flower and the dots. This way i felt the card looked better but i leave the verdict up to you.

As always I hope you like what I made, Theresa xx

I would like to enter this card in the following challenges:

Lavinia stamps challenge - summer colours
Fan-tastic Tuesday - anything goes
Sunday stamper - hello goodbye


Saturday, 5 July 2014

Dream....

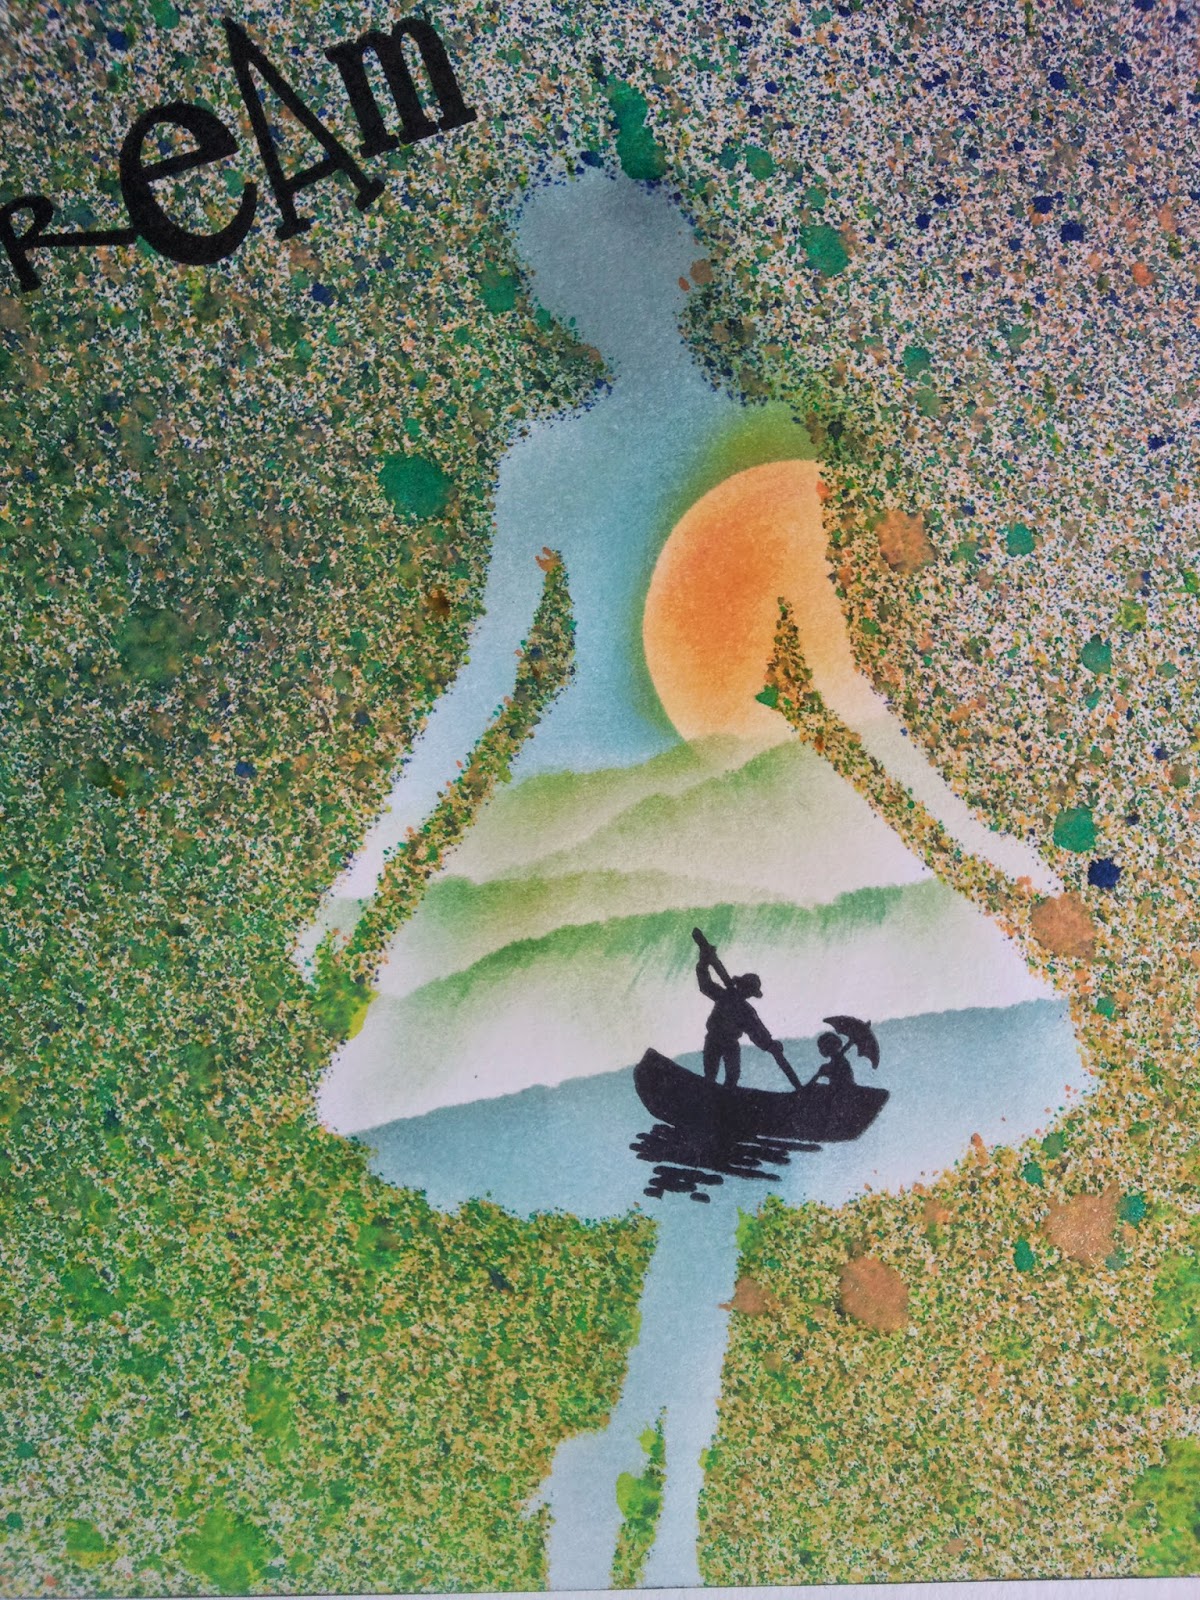
Today's offering I hope is something different. I saw a photo somewhere to this effect and since i've been wondering how I could replicate it on a card.

 Then earlier this week Brabara Gray showed this stencil on her blog and I knew what I wanted to do with it. So i ordered it and it arrived today.


So I went round edges of 7x7 gelli card with masking tape. Then i put one of the girls on top. I sprayed background with dylusions ink, sunshine yellow, midnight sparkle and lime green. Then I added a couple of spritzes of antique gold and a turquoise cosmic shimmer mica sprays. I lifted girl and removed tape.


Then it was time to play. I used ever green bough DI and a male up sponge and with the help of a torn piece of paper i created the hills. Then I put down crcle mask and added tumbled glass and iced spruce for the sky.
For the water I used weathered wood and tumbled glass.
The sun i coloured with mustard seed and the tiniest bit of barn door.


Then I stamped the image in black archival. I used one of the words from the word chains which i stamped in black archival ink. 
I had to cut border off as some ink had seeped under the tape. Iinked edges in black and mounted on 7x7 base card.
Stamps and stencil used are from Claritystamp.


This tilted pic is an attempt to try to capture some shimmer from the mica!

Hope you like my quirky offering, Theresa xx

Tuesday, 1 July 2014

my first canvas.......

Hello my friends. I am very excited about my offering today as it is my first canvas (please be kind). It is A5 in size. I started with a coat of white gesso. When it was dry I got out the gelli plate for the background.


This time i used the 9x11 plate. I started by spreading brown acrylic paint over the plate with the brayer. Then i put the leafy swirl stencil on top and removed as much paint as i could. I was left with this on plate (I can hear you saying 'this is turqoise. I thought she said she used brown.' You are right. This is from another project but the steps are the same.) Then I waited for a few minutes till it was completely brown. 


Next came the dotty stencil. I laid it on top of plate and brayered golden pearl acrylic through it. This meant that when I lifted it off i only had dots on plate. You can see this on pic below. Again colours don't match as from other project. Then it was time to wait for it to dry.


Then it was time for the final layer. Now i had a colour in mind but I didn't have it in acrylic. So I mixed 3 to get to it. I used phthalo turquoise, pistacchio and white, mixed them together and brayered all over. Then i put canvas on it and pulled print you can see on background.


Then I think I just played. I wanted to use grunge paste so I got out 2 stencils, tulip and swirl and put some paste through them. I left it to dry. In the meantime I got some Tim Holtz dictionary tissue paper and stamped and embossed 2 words from the word chains.


When the grunge paste was dry I put stencil back on and sponge some distress ink through it with a make up sponge. I used squeezed lemonade and mustard seed. Then I added emerald green glitter glue by cosmic shimmer on stem and some dots around flower and swirl. I also added some black and white enamel dots from Ranger.


To distress background further I added the script from the Journal stamp set in black archival ink. I held stamp in my hand so i could do it in a patchy way. I also stamped the swallow from same set.
Then using one of the corners, the diamonds and the twig from same set, I stamped with crafty notions glue and added gilding flakes to it.

Finally I added the words to the canvas. I stuck them down using matte glue and seal from Ranger.

And that was my first canvas. 


This is the card that I made to go with it. It follows  exactly the same process and the print was pulled off gelli plate at the same time as canvas. If you like this was the waste area.


I embellished it in the same way bar the sentiment which is stamped in black archival an clear embossed.


I'm aware this was a long post but it is a two fer really.

All the stamps and stencils used are from Claritystamp. I hope you enjoy my makes, Theresa xx

I would like to enter this in the following challenges:

Claritystamp challenge - anything goes
Simon says stamp monday challenge - white (white canvas, white gesso, white enamel dots, white grunge paste and white card, transformed white card and canvas)
Fan-tastic Tuesday - anything goes
PDE - many layers (paint layers)